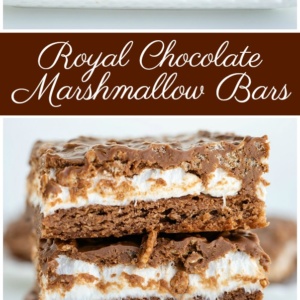
These Royal Chocolate Marshmallow Bars are delicious in every way. A marshmallow layer is sandwiched between a chocolate crust and a Krispie chocolate topping. They’re the best chocolate marshmallow bars! Watch the video showing you how to make these, then scroll to the bottom of this post and print out the recipe so you can make them at home.

These Chocolate Marshmallow Bars were one of the first goodies I made and brought to share with fellow teachers when I was teaching elementary school so many years ago. The teacher’s room was a great place to share my obsession with baking. And these Chocolate Marshmallow Bars were certainly a big hit.
This is an old recipe from Taste of Home magazine. It’s the kind of recipe you spot and rip out and save to make later. The best sort of occasion for serving these Chocolate Marshmallow Bars is one where you’ll be able to share them with a lot of people. You’ll get 36 bars out of this recipe. Once they’re chilled and firmed up, they’re the perfect hand-held dessert.

How to make Royal Chocolate Marshmallow Bars:
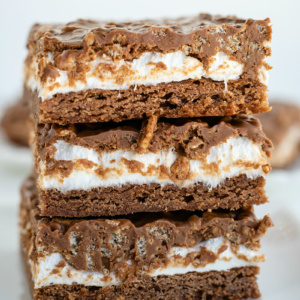
The only thing you’ll actually “bake” in this recipe is the 1st layer of these bars. It’s a chocolate cakey layer. When that comes out of the oven, 4 cups of mini marshmallows are immediately sprinkled on top of the baked 1st layer. Sprinkle them evenly because then you’ll return the pan to the oven to melt the marshmallows to create the 2nd layer.
TIP: At this point, you’ll want to have a knife ready to spread the melted marshmallows. If you use a regular ‘ol knife, the melted marshmallow will stick to the knife. Dip the knife into very warm water (better yet, stick the knife into the warm water in a tall glass a few minutes before doing this), and you should have an easier time spreading the melted marshmallows into an even layer without sticking.
For the 3rd and final layer, you’re basically going to make a base for Rice Krispie Treats that has chocolate and peanut butter additions. Then you’ll give the pan of bars some chill time in the refrigerator, so they’ll be easier to cut when firmed up.

Is there a substitute for peanut butter?
If you’re allergic to peanut butter (or just don’t care for it), feel free to use your favorite substitution. I recommend creamy almond butter or sunflower seed butter.
Here’s the pan you’ll need for this recipe:
You will need a 15x10x1-inch sheet pan to make these Chocolate Marshmallow Bars. If you don’t own a sheet pan, you might consider buying one or two of them. They’re a good price on Amazon. They’re called, “Half Sheet Pans,” and Amazon sells them in a two-pack for under $20. I use them for so many things– roasting vegetables and baking cookies are what I use sheet pans for most.

How do I store chocolate marshmallow bars, and how long will they keep?
Store these at room temperature in a well sealed container. They’ll keep for about 4 days. I don’t recommend trying to freeze them.
If you’re looking for more recipes to use up your mini marshmallows, try some of these:
- S’Mores Ice Cream Cake
- Rocky Road Ice Cream
- Avalanche Popcorn
- Rocky Road Fudge Bars
- Candy Bar Pie
- Chocolate Scratch Cake
Royal Chocolate Marshmallow Bars
Ingredients
1st LAYER
- 1½ cups granulated white sugar
- 3/4 cup (1½ sticks) butter, at room temperature
- 3 large eggs
- 1 teaspoon vanilla extract
- 1 1/3 cups all purpose flour
- 3 tablespoons unsweetened cocoa powder
- 1/2 teaspoon baking powder
- 1/2 teaspoon salt
2nd LAYER:
- 4 cups mini marshmallows
3rd LAYER:
- 8 ounces milk chocolate chips
- 3 tablespoons butter
- 1 cup peanut butter
- 2 cups Rice Krispies
Instructions
- Preheat the oven to 350 degrees F. Spray a 15-in. x 10-in. x 1-in. baking pan with nonstick spray.
PREPARE THE 1ST LAYER:
- In a large mixing bowl, use an electric mixer to combine the sugar and butter. Add the eggs and vanilla, and continue to mix until light and fluffy.
- In a medium bowl, whisk together the flour, cocoa, baking powder, and salt, and add to the butter mixture. Spread the batter evenly into the prepared pan, and bake 15 to 18 minutes.
PREPARE THE 2ND LAYER:
- Sprinkle marshmallows evenly over the first layer and return to the oven for 2 to 3 minutes. Using a knife dipped in water, spread the melted marshmallows evenly over the first layer. Let cool.
PREPARE THE 3RD LAYER:
- For the topping, combine the chips, butter and peanut butter in a medium saucepan. Cook over low heat, stirring occasionally, until melted and well-blended. Remove from heat and stir in the Rice Krispies. Spread evenly over bars.
- Chill until firm, and cut into bars.
Nutrition
Nutrition information is automatically calculated, so should only be used as an approximation.


Delicious!!!!!!!😋
These will not last long. My kids absolutely love them. I prefer to keep them in the fridge instead of room temp.
Do you have a recipe for homemade marshmallows? I would love to substitute for packaged
Thank you, I love reading your recipes,asking some and reading your stories,
roberta
I’ve never made homemade marshmallows- sorry!
Do you think it would be an absolute disaster if I use a 9 by 13 inch pan?
No, I think they’ll just be much taller!
YUM! I love chocolate and marshmallow together! These bars look amazing!
Not a huge fan of peanut butter is there something l can use as a substitute?
another nut butter?
I made this today and it turned out amazing. Thank you for sharing. For the topping I microwaved the ingredients for 45 seconds in 15s increments and it was very easy to spread.
Oh my! My grandma used to make these, she always called them I love you bars. She said she made them when she thought of me and to tell me how much she loved me. I now make them for my kids when they are having a rough day. Thanks for the memories!
OMG Lori…..wow, I have to make these!!!! look sooooo good
I love these bars, we have been making them for years. I think my grandma got the recipe from an old Taste of Home magazine. A true keeper!!
Love the pictures, makes me hungry for one now!