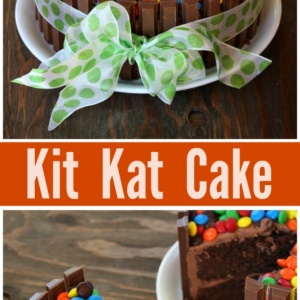
I have some fun news today! It’s my birthday! Yay! And I made a Kit Kat Cake! Yum! Watch the video showing you how to make this Kit Kat Cake, then scroll to the bottom of this post and print out the recipe so you can bake it at home.
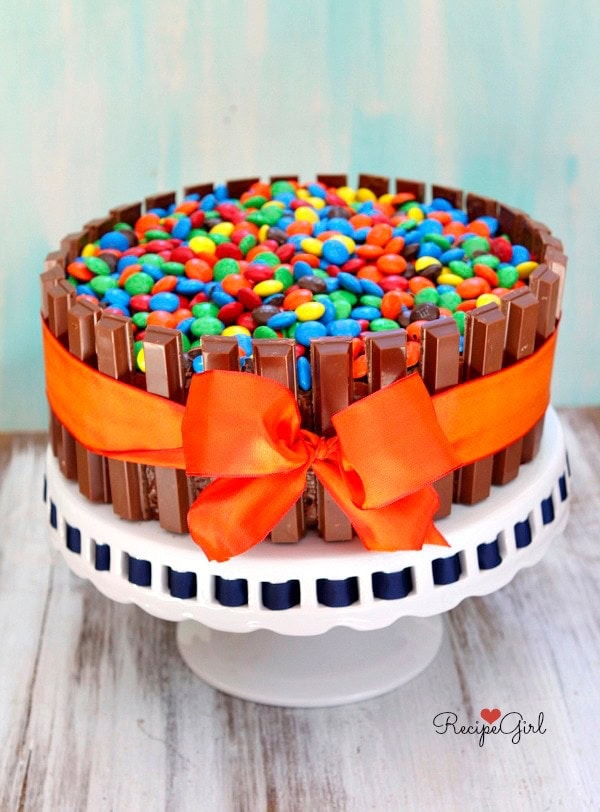
I signed a deal with Houghton Mifflin Harcourt to write The Recipe Girl Cookbook when this cake was originally shared in 2013. And I celebrated with this fun cake!
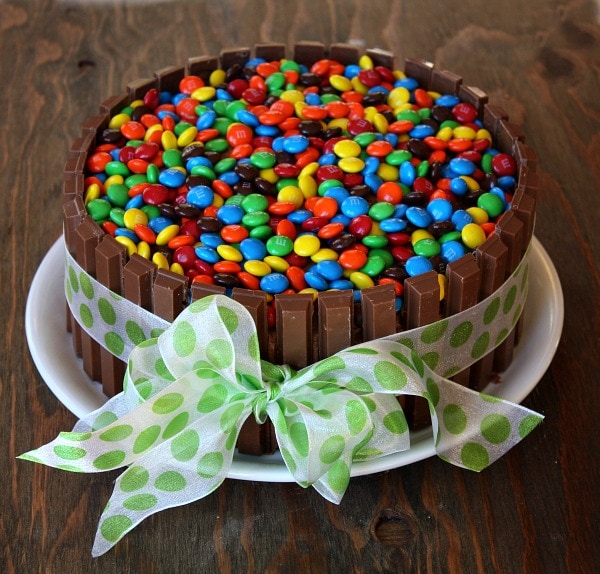
I saw this idea on the internet somewhere… surrounding a cake with Kit Kats, presenting it with a bow and topping it with M&M’s. I couldn’t get it out of my head, so I had to give it a shot myself.
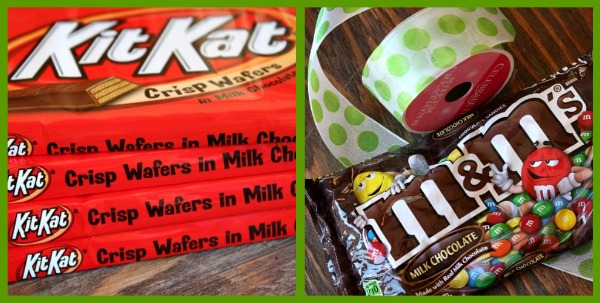
It’s really very simple to make. You’ll just need your favorite layer cake recipe (or a boxed mix), frosting, Kit Kat’s, M&M’s and ribbon.
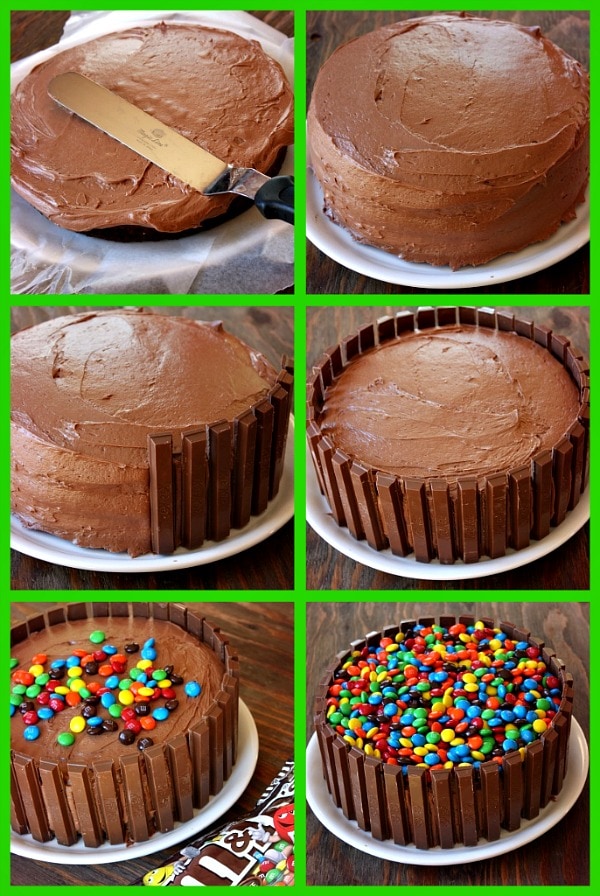
How to Make a Kit Kat Cake:
I think you’ll be surprised just how incredibly easy it is to pull this off. Frost a layer cake just as you would normally do- first one layer, then add the second and frost all the way around. Then stick Kit Kat’s all the way around the cake- they will just stick to the frosting. Then pour M&M’s on top. That’s it!
Can you use this method for any kind of layer cake?
Yes! Use your favorite two-layer cake, frost it, attach the Kit Kats, and pour M&M’s on top.
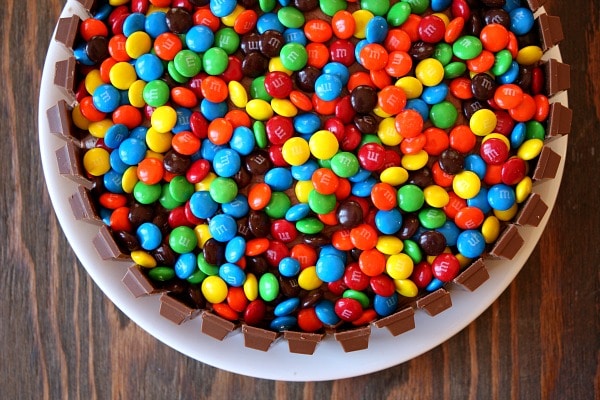
I love how the “sea” of M&M’s makes this cake look so pretty. I can envision making this cake on all of the holidays where special-colored M&M’s are available… red, white & green for a Christmas Kit Kat Cake… pink, white and red for a Valentine’s Kit Kat Cake. The possibilities are endless!
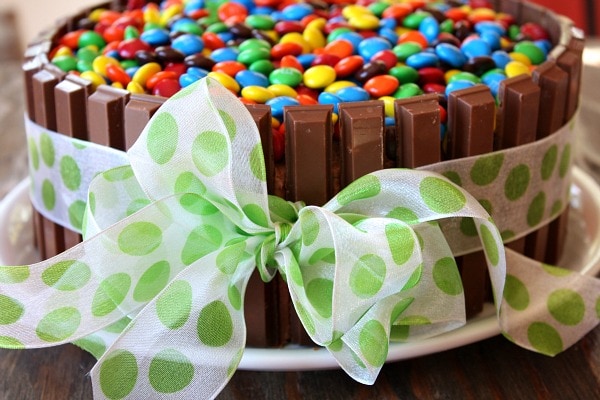
Wrap your brightest, cutest bow around the Kit Kat’s.
It makes a fun birthday cake.
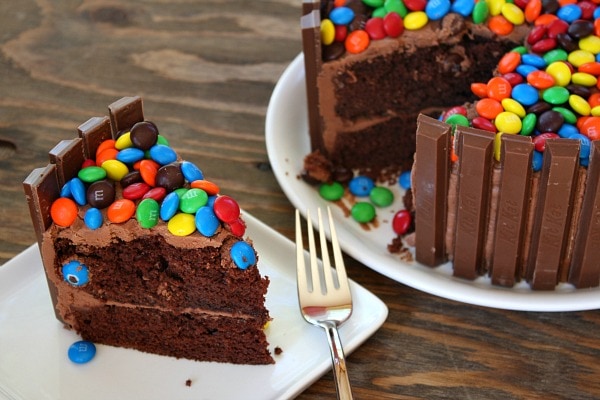
And this Kit Kat Cake is delicious too! Happy birthday to me!
When I quit teaching and debuted my recipe website back in 2006 and then added the blog in 2008, I never imagined that my life would take such a positive turn… that I would end up with a career that I love so much! I’m actually excited to wake up everyday and get to work in the kitchen, behind the camera and on the computer.
I pinch myself every single day to make sure this is all real, and I’m so grateful to my readers for making all of this cooking and recipe stuff possible. And I’ve written a cookbook! All of it is pretty much a dream come true. I love my job.
If you’re looking for more cake recipes that are great for celebrations, you might also enjoy my Red Velvet Cheesecake Cake or this Coconut Cake with Raspberry Buttercream Filling. Chocolate Stout Cake, Yellow Cake and Drumstick Cake are also fun cakes to bake!
Kit Kat Cake
Ingredients
CAKE:
- 1 box chocolate cake mix
- 1 cup all purpose flour
- 1 cup granulated white sugar
- 3/4 teaspoon salt
- 1 1/3 cups water
- 2 tablespoons vegetable or canola oil
- 1 teaspoon vanilla extract
- 1 cup sour cream
- 4 large eggs
CHOCOLATE BUTTERCREAM FROSTING:
- 1/2 cup (1 stick) salted butter
- 3 ounces cream cheese, at room temperature
- 16 ounces powdered sugar, sifted
- 1/4 cup milk
- 1 teaspoon vanilla extract
- 1 cup dark chocolate chips (or chopped dark chocolate)
DECOR:
- 36 Kit Kat candy bar sticks (13.5 ounces of Kit Kats)
- One 12-ounce bag M&M's
- Ribbon, optional
Instructions
PREPARE THE CAKE:
- Preheat the oven to 325°F. Grease and flour two 9-inch round cake pans and line a cupcake pan with 6 liners (you're going to have 6 cupcakes to munch on along with your cake!)
- In a large bowl, whisk together the cake mix, flour, sugar and salt. Add the remaining ingredients and beat with a hand mixer for 2 minutes, or until well blended.
- Scoop the batter into 6 cupcake liners 3/4-full. Divide the remaining batter between the two prepared round pans. Bake the cupcakes for about 25 minutes, and bake the cake rounds 35 to 40 minutes, or until a toothpick inserted in the center comes out clean. Let the cake cool in the pans for 20 minutes, then remove the cake layers to a wire rack to cool completely.
- When the cake is cool, you're ready to assemble. Place one layer on a serving plate, and tuck strips of waxed paper underneath the sides of the cake.
PREPARE THE FROSTING:
- In a large bowl, beat butter and cream cheese at medium speed with an electric mixer until creamy. Gradually add powdered sugar, beating at low speed until blended. Increase speed to medium, and slowly add milk and vanilla, beating until smooth. Microwave chocolate chips in a microwave-safe bowl at MEDIUM 1 1/2 to 2 minutes or until melted and smooth, stirring at 30 second intervals. Gradually add melted chocolate to mixture; beat until blended and smooth.
ASSEMBLE THE CAKE:
- Frost the 1st cake layer. Set the 2nd layer on top of the first. Frost the 2nd layer and along the sides of the cake too. Stick Kit Kat's to the sides of the cake, leaving a very small space in between each Kit Kat (1/4-inch). Wrap a bow around the cake, securing the Kit Kat's. Fill the top of the cake with M&M's. Pull out the strips of waxed paper and discard. Use any extra frosting to frost your 6 extra cupcakes.
- If you refrigerate the cake for a couple of hours or so, it will be much easier to cut and serve. Of course, you'll need to remove the bow just before serving.
Notes
- *You can certainly use your favorite layer cake recipe for this cake. The doctored-up cake mix recipe that is included here is actually quite good!
- You can also use a yellow cake or your favorite flavor... following the same instructions here for jazzing it up.
- Technically, you can use all of the batter in two 9-inch round pans, but it might make the cake too high to work for this recipe. You don't want the cake to stand higher than the height of the Kit Kat's- or they will not be able to act as a "fence" to hold in the M&M's.
Nutrition
Nutrition information is automatically calculated, so should only be used as an approximation.


this was so insanely good tasting. Thank you for sharing this recipe with us.
Can this cake be made with TimTams instead of Kit Kat bars? 🙂 Your opinion
I’m afraid I do not know what Tim Tams are!
I made this cake last weekend for my daughter’s 5th birthday and it was a huge success! Everyone absolutely loved the look of it. The only difference we had was that we only used orange M&M’s in the center (my daughter will only eat those). Just wanted to say thanks for making here bday extra special.
That’s cute that she will only eat the orange ones… how on earth did that come about? 🙂
This cake was a huge hit! It was easy to make with easy directions and turned out wonderful. I took a twist and make a bunt cake and used some of the cupcakes to make a buttercream/cake filling in the middle. I loved the part about making cupcakes! That make me literally laugh out loud.
Thanks for the recipe!!
This is amazing this was my dads birthday present this year!! Thank you and keep up the great recipes! 🙂
I’ve been scoping out this cake idea for a while and i’ve decided to make it for my sons first birthday at the park!! Just one question- where can i find “giant kitkat bars”?… (i know ur not refering to kitkat chunky)
i live in Toronto, Canada and i don’t think i’ve ever seen anything other than the reg kitkat, chunky , mini bite size and ofcourse kitkat bites. any suggestions would be helpful. Thanks
You don’t actually need “giant Kit Kats,” but rather the jumbo sized bar that has a lot of Kit Kats attached to it.
Thank you for this idea and recipe. We needed to make something special for my sister who is the designated “cake-baker” for all celebrations in our large family. With the help of my 3 daughters we made this cake and truly surprised my sister who was expecting a cake from Costco!!!!! It not only looked impressive, it was delicious too!
Great to hear!
Is it ok to use milk chocolate for the icing instead?
Looks great! Can’t wait!
Use any icing you’d like!
how much is 1 pound powdered sugar, in grams 1/2 cup salted butter
I don’t know, but Googling that sort of thing will fetch you an answer.
Hi, Lori I was wanting to ask you if it was hard to make this cake , i am taking a foods class and we only have 45 mins to make something and I really wanted to make this .. Do you think that maybe I should make the cake before and then decorate it when I get to class
If you brought the cake part in already baked, it’s super easy to assemble and decorate after that. Great idea!