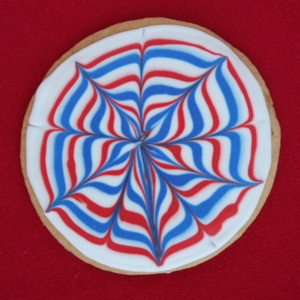
The July issue Martha Stewart Living magazine has these cool Fireworks Cookies featured on the cover. I made a version of these for Halloween last year (Spiderweb Cookies), using the special toothpick-drag technique described for this cookie. They’re always a hit since they look pretty darn cool. Read on to see how they’re made…
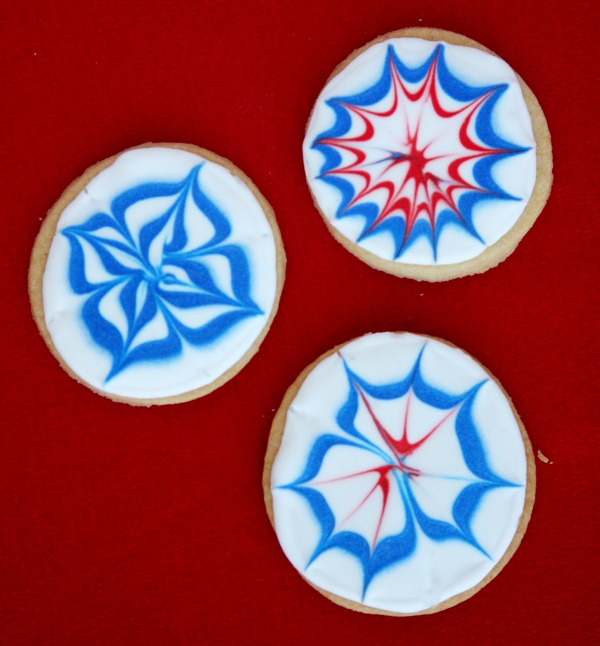
The cool thing about these cookies is that you can let the kids have their fun doing the toothpick dragging, and every cookie will turn out different!
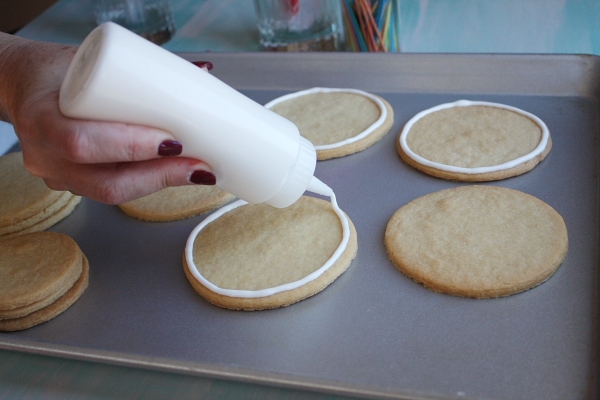
When I make decorator cookies, I always use the same recipe. It turns out delicious, sturdy cookies that don’t taste like cardboard. I also use the same royal icing recipe. Whip up a batch of that and use most of it for the white base. First you edge the cookies with the royal icing. Wilton sells these squeeze bottles at craft stores like Michael’s. They’re the easiest way to decorate these cookies.
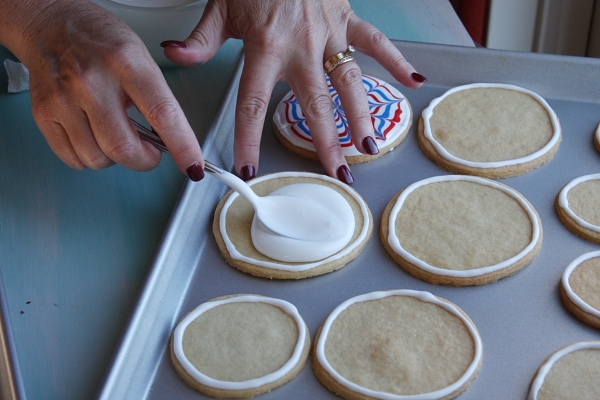
Once the edges have had a chance to set a bit, you “flood” the centers of the cookies with royal icing. Just take a spoon and scoot the royal icing to the edges.
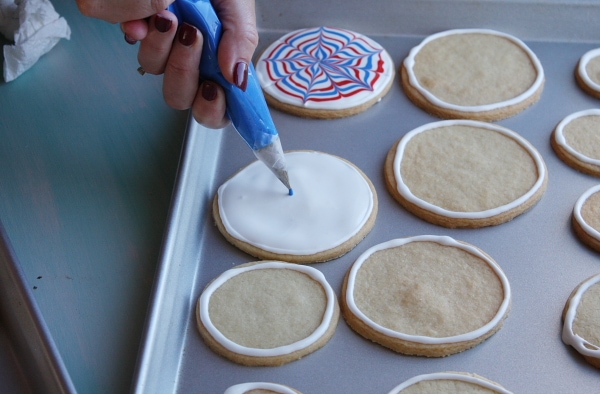
Immediately after you flood a cookie, you’ve got to do the color. Wish I had put my red and blue in the same squeeze bottles (it would have been much easier and more efficient). I used Wilton’s Red-Red and Royal Blue icing colors- also available at Michaels. Start by putting a little dot of color in the center of the cookie.
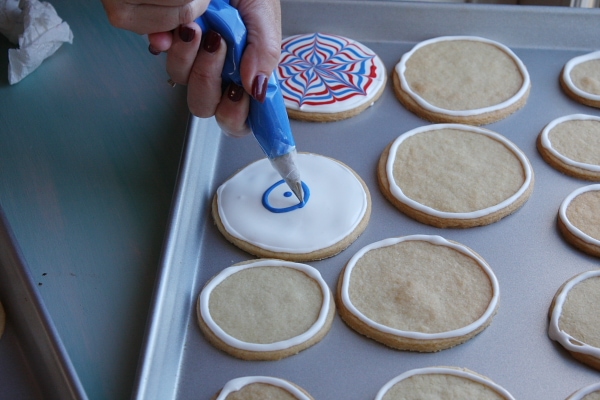
Make circles of color around the dot.
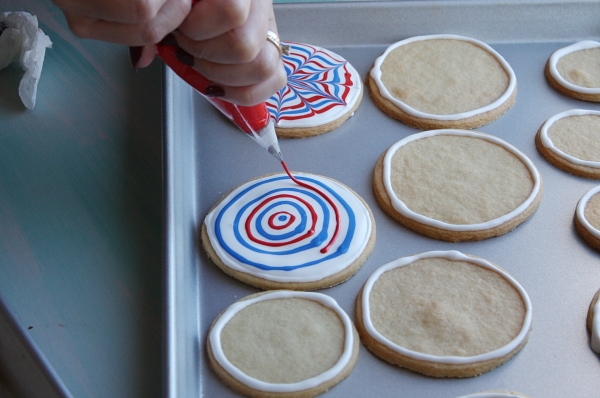
Add red too if you’d like.
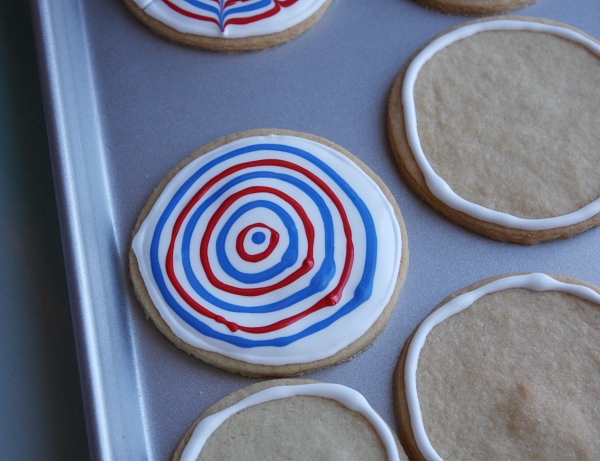
It doesn’t have to be perfect. All of your wobbly circles will not be visible when you’re done with the design.
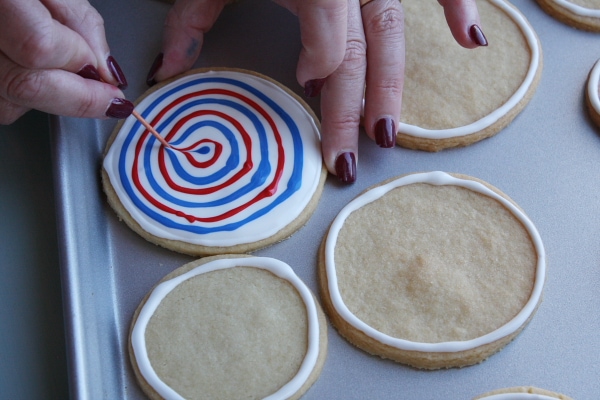
Take a toothpick and drag from the center to the edge.
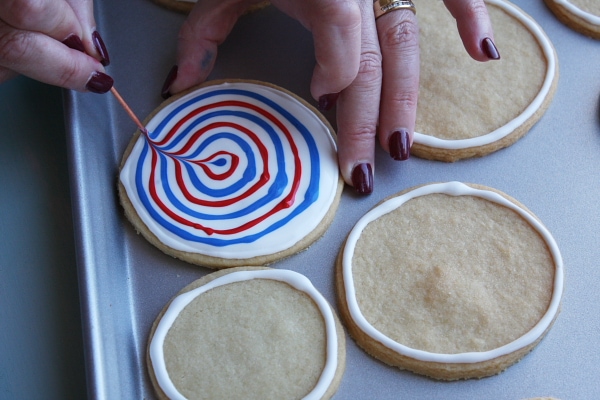
On this cookie I curved the line out to the edge, but you can go straight out if you’d prefer…. or do some of each. There are no rules!
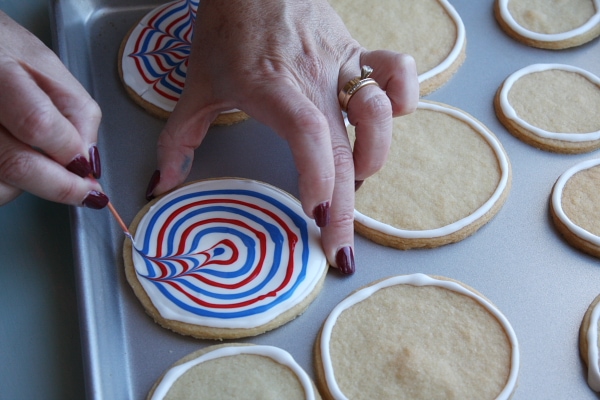
Keep dragging from the center out to the edge. Another way you can do it is to drag from center to the edge and then drag from edge to center… alternating with each toothpick drag. Remember… there are no rules!
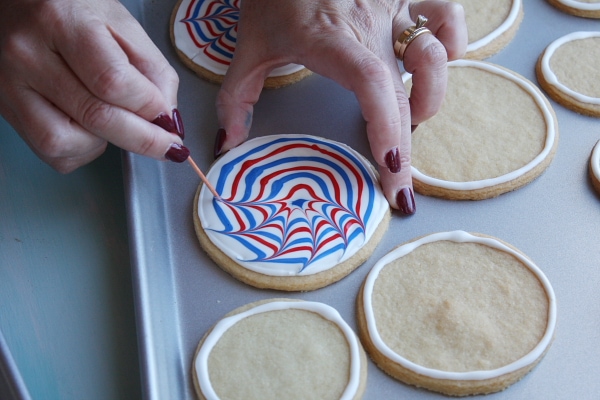
Keep going…
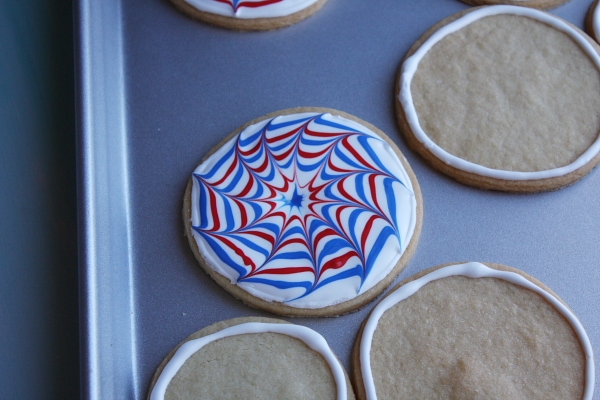
Done! I’m not gonna lie. These are not a quick and easy cookie. They’re actually quite t.i.m.e. c.o.n.s.u.m.i.n.g! But I thought they were pretty worth it. The looks on the kid’s faces when they see these is just priceless. And who doesn’t love a pretty, decorated cookie? 🙂 Here are some of the other designs I made.
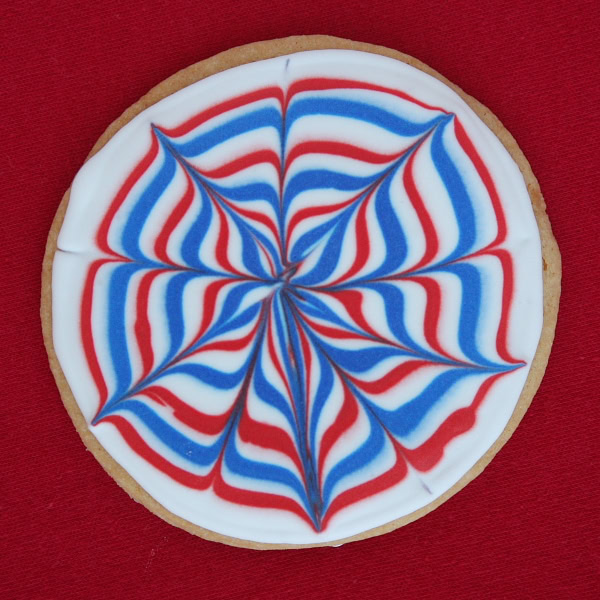
On this cookie I dragged a toothpick from center to the edge on one stroke and then from edge to the center on the next stroke. I thought these turned out to be the coolest looking ones.
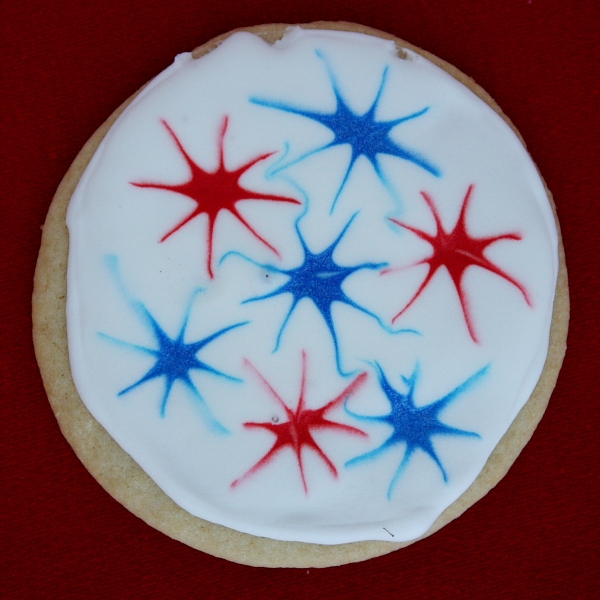
My sister made this one, which I think looks most like exploding fireworks! She just put dots of red and blue on the cookie and then dragged a toothpick through each dot to make the “fireworks.” So cute!
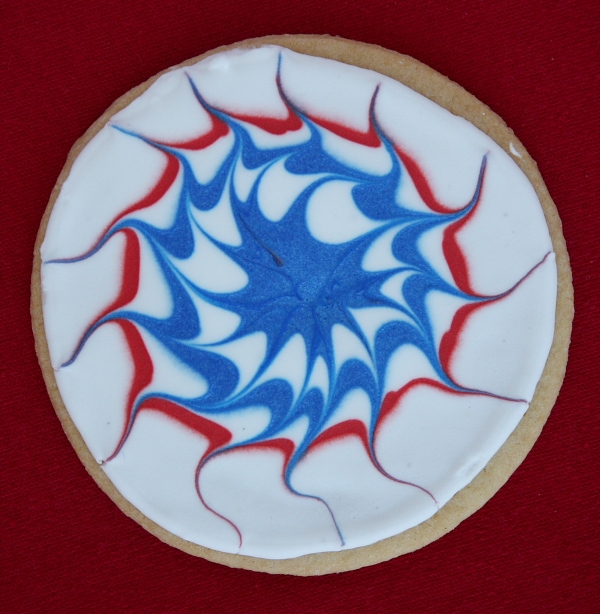
Who knows what I did here! I think I just got a little funky with the toothpick and made some sort of curvy line going from center to edge. Funky!
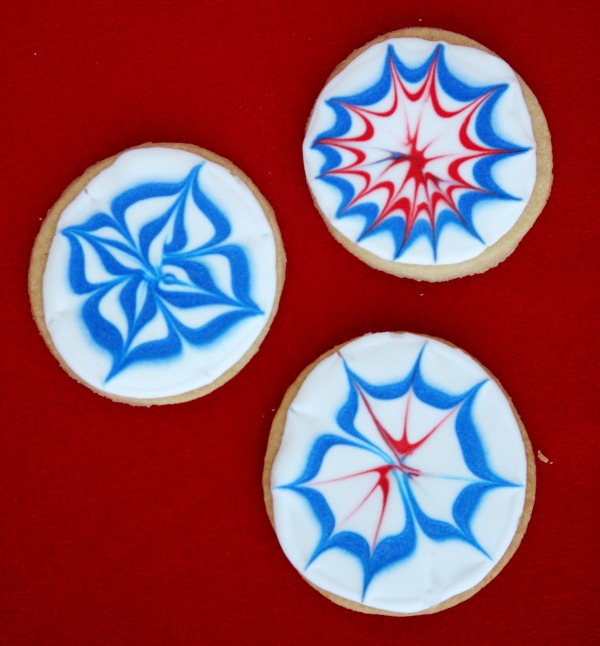
And a few more variations… it’s a fun project since no two cookies really ever turn out to look the same. If you’re going to make these for 4th of July, I recommend that you make them on Saturday or Sunday morning so that the cookie icing really has a chance to harden before the big day. Have fun with them!
Fireworks Cookies
Red, white and blue decorated patriotic cookies!
Prep Time: 2 hr, 30 min + chill time & drying time
Cook Time: 10 min
Ingredients:
COOKIES:
1 cup butter, softened
1 cup granulated white sugar
3 cups all-purpose flour
1 1/2 teaspoons baking powder
1 large egg
1 teaspoon vanilla extract
1/2 teaspoon salt
ROYAL ICING:
1 pound powdered sugar
5 Tablespoons meringue powder
1/2 cup water
liquid or gel-paste food coloring (optional)
Instructions:
Prepare the cookies:
1. Cream butter and sugar until light and fluffy. Add eggs and vanilla. Mix well. Mix dry ingredients in a separate bowl, and add a little at a time to butter mixture. Mix until flour is completely incorporated and dough comes together.
2. Chill for 1 to 2 hours (or see tips below).
3. Preheat oven to 350°F. Make sure you let your oven preheat for at least 1/2-hour before baking these or any other cookies.
4. Roll to desired thickness and cut into circles. If you don't have a circular cookie cutter, use a drinking glass or a small plastic tub. Bake on ungreased baking sheet for 8 to 10 minutes, or until just beginning to brown around the edges. (longer time for thicker cookies)
5. Gently remove cookies with a spatula and let them cool on wire racks.
Prepare the icing:
1. In the bowl of an electric mixer fitted with the paddle attachment, combine sugar, meringue powder, and a scant 1/2 cup water on low speed. Beat until mixture is fluffy yet dense, 7 to 8 minutes.
2. To thin the icing for flooding (filling in areas with a thin layer of icing), stir in additional water, 1 teaspoon at a time. Test the consistency by lifting a spoonful of icing and letting it drip back into the bowl; a ribbon should remain on the surface for 5 to 7 seconds.
3. Put 2/3 of the icing in one bowl and divide the rest between two separate bowls. To tint the icing red and blue, dip a toothpick or wooden skewer into food coloring, and gradually mix it in until the desired shade is reached. Place the colored icing into squeeze bottles (or use pastry bags with small, round tips).
Decorate the cookies:
1. Place white icing in a squeeze bottle (or use a pastry bag with a small, round tip). Edge the cookies with white by drawing a white icing line around the edge of the cookie with the squeeze bottle. Let them set for at least 10 minutes so that the edges are able to act as a barrier for the icing that you'll put in the middle. Flood the cookies with white icing- one at a time. Spoon white icing onto a cookie and use the spoon to gently edge the icing to the sides of the cookie. Immediately squeeze a dot of color into the center of the flooded cookie. Draw circles of color around the dot (alternating colors if you'd like). Drag a toothpick from the center of the cookie to the edge, wipe the toothpick with a paper towel, and repeat. With each cookie that you decorate, try something different. Drag the toothpick from the edge to the center. Alternate which way you drag. They'll all turn out different! Let the cookies dry on your counter-top until the icing hardens. It'll take a good 24 hours for them to harden completely.
Tips:
*Rather than wait for your cookie dough to chill, take the freshly made dough and place a glob between two sheets of parchment paper. Roll it out to the desired thickness, then place the dough and paper on a cookie sheet and pop it into the refrigerator. Continue rolling out your dough between sheets of paper until you have used it all. By the time you are finished, the first batch will be completely chilled and ready to cut. Re-roll leftover dough and repeat the process. Add added bonus is that you are not adding any additional flour to your cookies.
*Special supplies for this recipe can be found at craft stores like Michaels. I used Wilton's plastic squeeze bottles for easy decorating and Wilton's icing colors (red-red and royal blue). Meringue powder can also be found at Michaels. Or all of it can be ordered on Wilton.com.
Source: RecipeGirl.com (idea from Martha Stewart Living)
COOKIES:
1 cup butter, softened
1 cup granulated white sugar
3 cups all-purpose flour
1 1/2 teaspoons baking powder
1 large egg
1 teaspoon vanilla extract
1/2 teaspoon salt
ROYAL ICING:
1 pound powdered sugar
5 Tablespoons meringue powder
1/2 cup water
liquid or gel-paste food coloring (optional)
Prepare the cookies:
1. Cream butter and sugar until light and fluffy. Add eggs and vanilla. Mix well. Mix dry ingredients in a separate bowl, and add a little at a time to butter mixture. Mix until flour is completely incorporated and dough comes together.
2. Chill for 1 to 2 hours (or see tips below).
3. Preheat oven to 350°F. Make sure you let your oven preheat for at least 1/2-hour before baking these or any other cookies.
4. Roll to desired thickness and cut into circles. If you don't have a circular cookie cutter, use a drinking glass or a small plastic tub. Bake on ungreased baking sheet for 8 to 10 minutes, or until just beginning to brown around the edges. (longer time for thicker cookies)
5. Gently remove cookies with a spatula and let them cool on wire racks.
Prepare the icing:
1. In the bowl of an electric mixer fitted with the paddle attachment, combine sugar, meringue powder, and a scant 1/2 cup water on low speed. Beat until mixture is fluffy yet dense, 7 to 8 minutes.
2. To thin the icing for flooding (filling in areas with a thin layer of icing), stir in additional water, 1 teaspoon at a time. Test the consistency by lifting a spoonful of icing and letting it drip back into the bowl; a ribbon should remain on the surface for 5 to 7 seconds.
3. Put 2/3 of the icing in one bowl and divide the rest between two separate bowls. To tint the icing red and blue, dip a toothpick or wooden skewer into food coloring, and gradually mix it in until the desired shade is reached. Place the colored icing into squeeze bottles (or use pastry bags with small, round tips).
Decorate the cookies:
1. Place white icing in a squeeze bottle (or use a pastry bag with a small, round tip). Edge the cookies with white by drawing a white icing line around the edge of the cookie with the squeeze bottle. Let them set for at least 10 minutes so that the edges are able to act as a barrier for the icing that you'll put in the middle. Flood the cookies with white icing- one at a time. Spoon white icing onto a cookie and use the spoon to gently edge the icing to the sides of the cookie. Immediately squeeze a dot of color into the center of the flooded cookie. Draw circles of color around the dot (alternating colors if you'd like). Drag a toothpick from the center of the cookie to the edge, wipe the toothpick with a paper towel, and repeat. With each cookie that you decorate, try something different. Drag the toothpick from the edge to the center. Alternate which way you drag. They'll all turn out different! Let the cookies dry on your counter-top until the icing hardens. It'll take a good 24 hours for them to harden completely.
Tips:
*Rather than wait for your cookie dough to chill, take the freshly made dough and place a glob between two sheets of parchment paper. Roll it out to the desired thickness, then place the dough and paper on a cookie sheet and pop it into the refrigerator. Continue rolling out your dough between sheets of paper until you have used it all. By the time you are finished, the first batch will be completely chilled and ready to cut. Re-roll leftover dough and repeat the process. Add added bonus is that you are not adding any additional flour to your cookies.
*Special supplies for this recipe can be found at craft stores like Michaels. I used Wilton's plastic squeeze bottles for easy decorating and Wilton's icing colors (red-red and royal blue). Meringue powder can also be found at Michaels. Or all of it can be ordered on Wilton.com.
Source: RecipeGirl.com (idea from Martha Stewart Living)



We made these for 2015 4th of July picnic. They tasted great and everyone thought I had bought them. Doesn’t say much for what my family thinks my talents are but in honesty I just made them and prepped them and the granddaughters made all the designs. Easy peasy!!
Good point, I might consider keeping them in a cooler, at least until the get handed out.
These are just what I was searching for 🙂 If I put them in individual cello bags for the 4th, will the icing get gooey in the summer heat? Any thoughts, or experience with this? Thank you!
It shouldn’t as the icing hardens. I’d be more worried about the cookies getting too soft in the summer heat and breaking apart.