Years ago I saw a post on How to Make Easter Bunny Cupcakes from Betty Crocker. I was quite certain I could jazz them up a bit to make a delicious Easter treat that would appeal to adults as well as children.
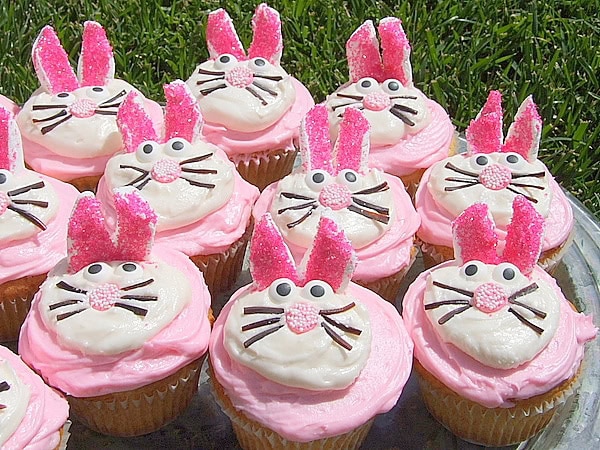
Betty used a box cake mix and canned frosting (which you could certainly do.) I doctored up cake mix to make them taste better, and I used a vanilla buttercream frosting. Here are the little goodies you’ll need:
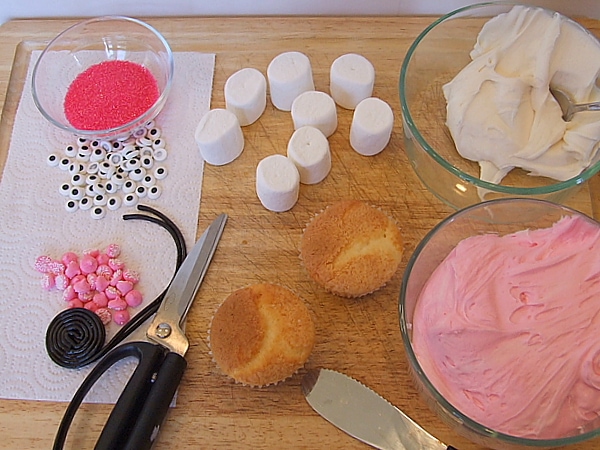
Candy for Easter Bunny Cupcakes:
The “eyes” are from a cake decorating shop. If you have trouble finding those, you can sub anything small and round- snip off the end of a blue jellybean, etc. The noses and whiskers I was able to find in my market’s bulk candy aisle- the pink noses are those little chocolate chip-shaped dream mints (again, use whatever works for you.) The black whiskers are skinny black licorice, which was still a tad too thick so I cut them in half to make them thinner. You could also use brown or black sprinkles.
How to make Easter Bunny Cupcakes:
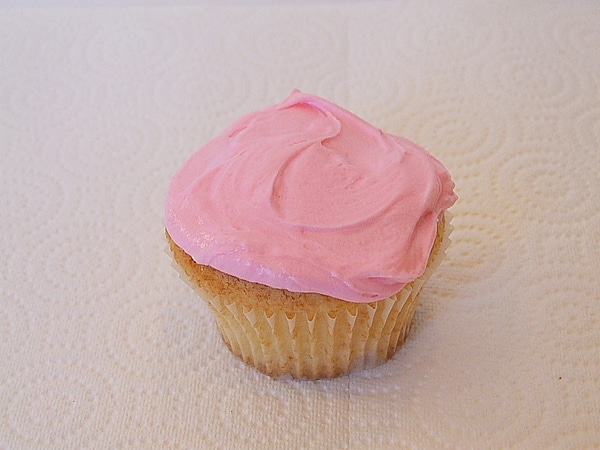
Frost a cupcake with pink frosting.
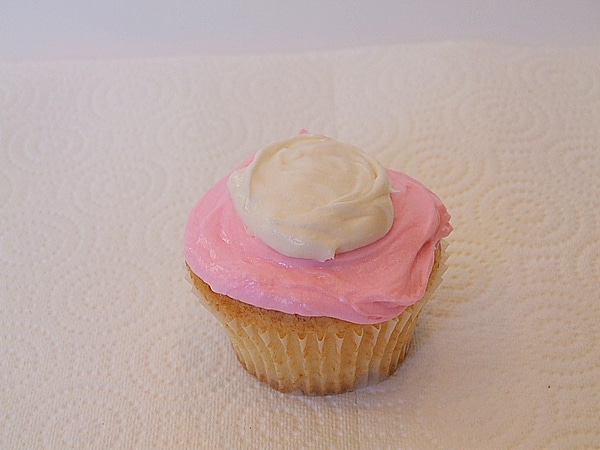
Spread a circle of vanilla buttercream frosting in the middle.
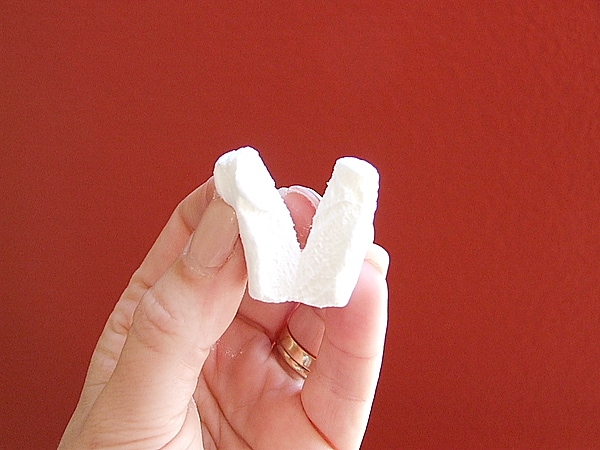
Cut the marshmallows in half, and then cut almost in half again to make the ears.
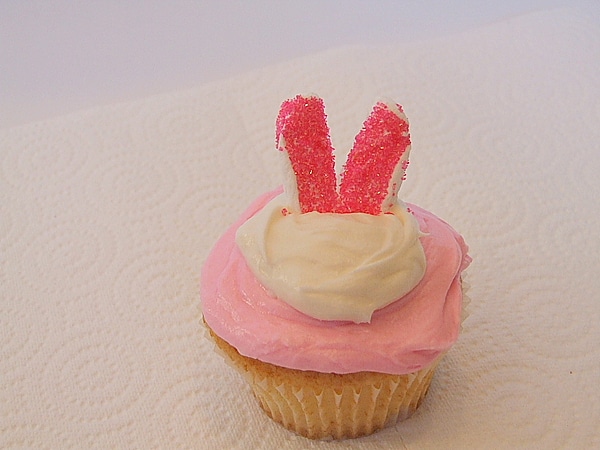
Dip the sticky (cut) part in pink sugar to create the inner-ear color.
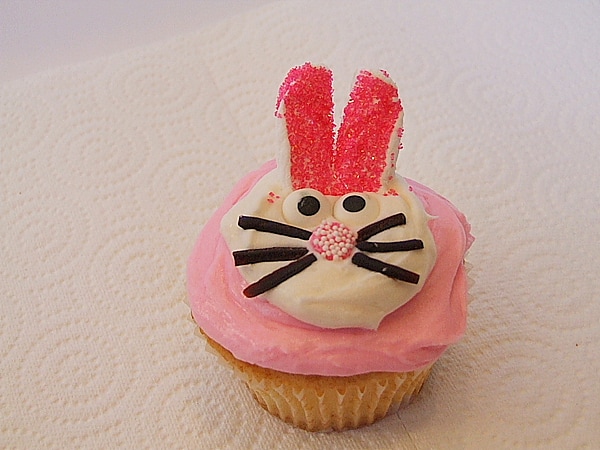
Finish decorating the face, and there you have it… little bunny cupcakes that kids go nuts over! But don’t be fooled… adults like them too 🙂 The cupcake tastes a bit like angel food cake, and the frosting is a yummy cream cheesy buttercream. Kids love to make cupcakes, so show your kids how to make these Easter bunny cupcakes. It’s a fun project to do together in the kitchen!
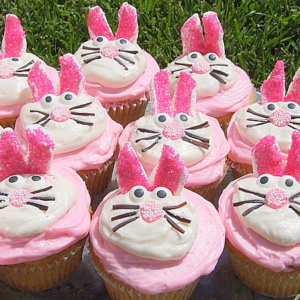
Easter Bunny Cupcakes
Ingredients
CUPCAKES:
- One 15.25 ounce box white cake mix
- 1¼ cups buttermilk
- ¼ cup (½ stick) salted butter, melted
- 2 large eggs
- 2 teaspoons vanilla extract
- ½ teaspoon almond extract
VANILLA BUTTERCREAM FROSTING:
- ½ cup (1 stick) salted butter, at room temperature
- 3 ounces cream cheese, at room temperature
- 16 ounces powdered sugar
- ¼ cup milk or cream
- 1 teaspoon vanilla extract
DECOR:
- pink food coloring (gel paste works best)
- 6 large marshmallows
- pink sugar
- candy decorations (see Recipe Notes below for tips)
Instructions
PREPARE THE CUPCAKES:
- Preheat the oven to 350°F. Line two 12-cup cupcake tins with cupcake liners.
- In a large bowl, use an electric mixer to beat all ingredients at low speed just until the dry ingredients are moistened. Increase the speed to medium, and beat 2 minutes or until the batter is smooth, stopping to scrape the bowl as needed.
- Coat paper muffin cups lightly with cooking spray; spoon the batter evenly into the baking cups, filling each two-thirds full.
- Bake for 25 minutes or until a wooden pick inserted in center comes out clean. Cool in pans on wire racks 10 minutes; remove cupcakes from pans to wire racks, and cool 1 hour or until completely cool.
PREPARE THE FROSTING:
- In a large bowl, use an electric mixer to beat the butter and cream cheese at medium speed until creamy. Gradually add the powdered sugar, beating at low speed until blended. Increase the speed to medium, and slowly add the milk and vanilla, beating until smooth. Split the frosting into two bowls. Stir a little pink food color into 1 bowl of frosting. Frost the cupcakes with the pink frosting.
ASSEMBLE THE CUPCAKE:
- Spoon 1 heaping teaspoonful of white frosting on the center of each cupcake. To make ears, cut each large marshmallow crosswise into 5 pieces with kitchen scissors. Using scissors, cut through center of each marshmallow piece to within ¼-inch of edge. Separate to look like bunny ears; press 1 side of cut edges into pink sugar, flattening slightly. Arrange on each of the white frosting mounds as shown. Use candy decorations and sprinkles/licorice pieces to make eyes, nose and whiskers. Store loosely covered. I like to refrigerate them in a cupcake container.
Notes
- A baking supply shop is a good place to buy some of the candies for the face. Use candy eyes, thin black licorice for the whiskers and nonpareils or dream mints for the noses.
- If you have only one 12-cup muffin pan, cover and refrigerate the rest of the batter while baking the first batch. Then bake the rest of the batter in the cooled muffin pan, adding 1 or 2 minutes to the bake time.
- You can certainly use any white cupcake recipe that you wish for this.
- To save time, use tubs of white icing and just color those.
Nutrition
Nutrition information is automatically calculated, so should only be used as an approximation.



You are too creative! Your little guy is very lucky to have such a fun mom willing to try these sorts of recipes/ideas. My mom would bake bread in the shape of a bear or bunny for me when I was little and I loved it. Good memories 🙂
So cute! Happy Easter!
Cute and adorable! Very inspiring!
Aw these are adorable!!
These are soooo cute! I love them! Hope you have a wonderful Easter…
That is so cute and creative!
Those are darling! Happy Easter!
Lori, you are indeed “crafty”…the kids will love’em tomorrow.
So, so darling! I can’t get over how cute they are and I’m glad you included some step-by-step photos and a photo of all your supplies so dummies like me might possibly attempt them. SO CUTE!
CUTE CUTE CUTE!!!