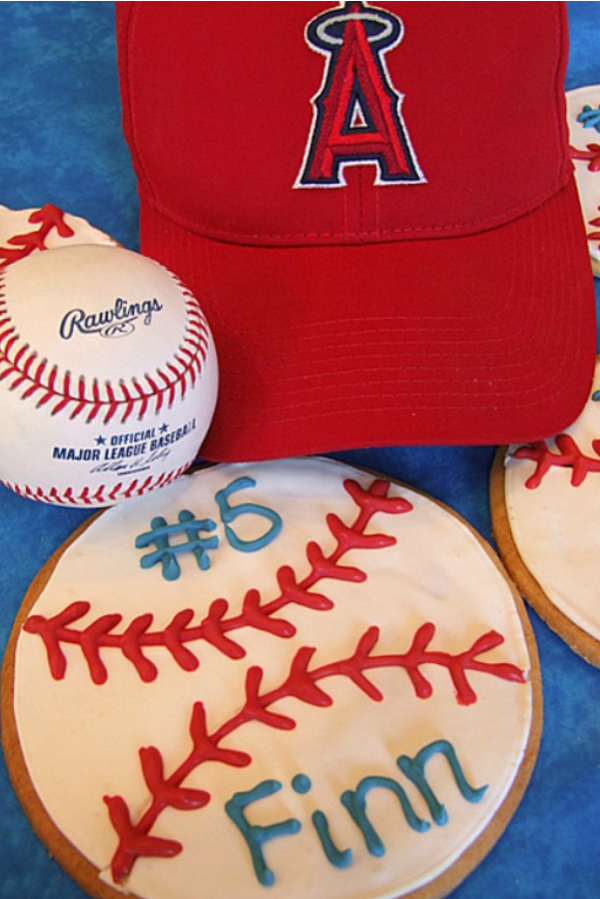
To mark the end of our Little League season this year, I created Baseball Cookies for each of the kids on my son’s team.
How to Make Baseball Cookies:
I use this great recipe that I found for cut out cookies: No Fail Sugar Cookies, which originally came from Kitchengifts.com. I make giant five-inch diameter Baseball Cookies- using a tupperware bowl as my cut-out tool.
I use KitchenGift’s tip for rolling out dough without the mess: Rather than wait for your cookie dough to chill, take the freshly made dough and place a glob between two sheets of parchment paper. Roll it out to the desired thickness, then place the dough and paper on a cookie sheet and pop it into the refrigerator. Continue rolling out your dough between sheets of paper until you have used it all. By the time you are finished, the first batch will be completely chilled and ready to cut. Re-roll leftover dough and repeat the process. Add added bonus is that you are not adding any additional flour to your cookies. This process works WONDERFULLY!
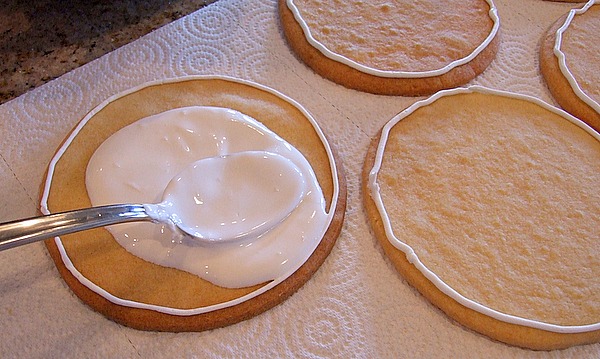
Martha Stewart’s Royal Icing works really well for decorator cookies. I make the whole batch and then divide it up into 3 tupperware bowls. Place the lids on each until ready to use or they’ll begin to harden. With icing tub #1, I pipe all of the edges on first and let those dry a little bit. Then I thin out icing tub #1 slightly and used it to flood the centers. If you give it enough time, it hardens nicely.
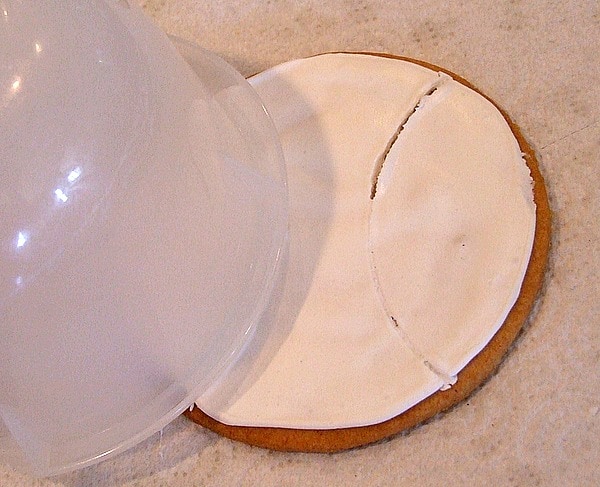
To make nice, even arcs for the stitching on the baseball cookies, I use the edge of the same tupperware that I use to cut out the cookies to make impressions.
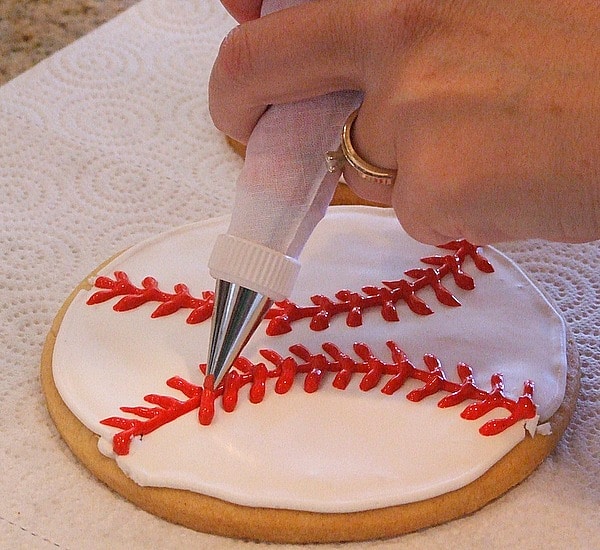
With icing tub #2, I mix in 1 bottle of red food coloring to get a nice dark red color. If you use too little, you’ll end up with magenta stitches. Boys don’t like magenta! Then I pipe red icing into the impressions, and also add the stitches.
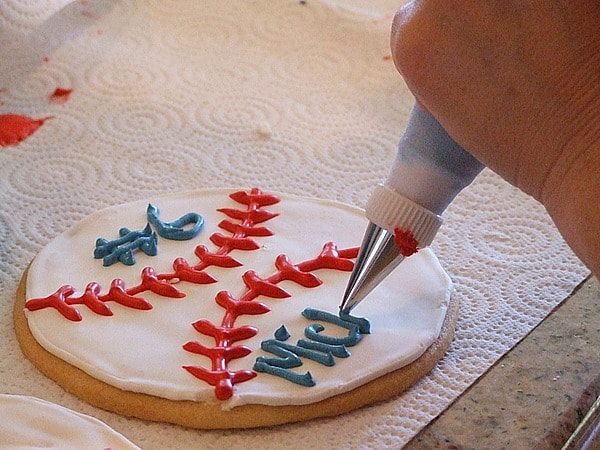
Icing tub #3 is mixed with blue food coloring. Each Baseball Cookie can be personalized with a name and a number.
I make nice, thick 5-inch cookies… and I end up with about 18. It’s nice to have a couple extra ones because it’s inevitable that one of them will get messed up at some point during the decorating process.
If you’ve got 24 hours to let these dry completely, you’ll end up with icing that hardens nicely. I’m sometimes in a bit of a rush when I make these, so I use a table fan to dry them (and that works just fine too.) Each cookie can be slipped into its own quart-sized baggie and they are good to go.
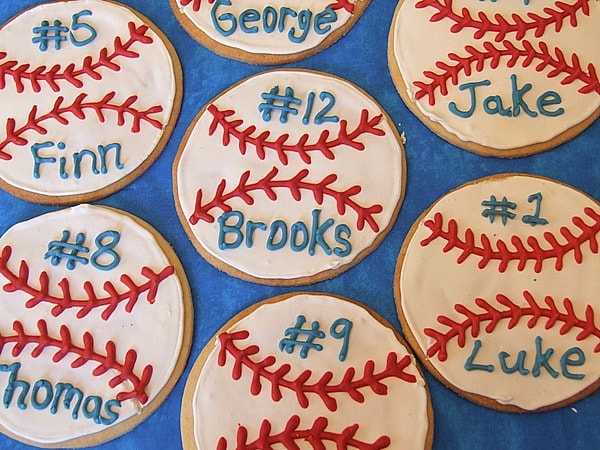
Our little league final season game was a tie (happy kids all around!) The boys loved their Baseball Cookies. And they especially enjoyed the fact that they were personalized. The moms and dads who stole bites from their kid’s cookies noted how delicious they were. And many of the parents asked me where I purchased the cookies.
Baseball Cookies
Ingredients
COOKIES:
- 2 cups butter, at room temperature
- 2 cups granulated white sugar
- 2 large eggs
- 2 teaspoons vanilla extract
- 6 cups all purpose flour
- 3 teaspoons baking powder
- 1 teaspoon salt
ICING:
- 16 ounces powdered sugar
- 5 tablespoons meringue powder (see recipe notes below)
- 1/2 cup water
- liquid or gel paste food coloring (red for laces + one more color)
Instructions
MAKE THE COOKIES:
- In a large bowl, use an electric mixer to cream the butter and sugar until light and fluffy. Add the eggs and vanilla. Mix well. Whisk together dry ingredients in a separate bowl, and add a little at a time to butter mixture. Mix until the flour is completely incorporated and the dough comes together. Cover and chill for 1 to 2 hours (or see recipe notes below).
- Preheat oven to 350°F. Make sure you let your oven preheat for at least 1/2-hour before baking these or any other cookies.
- Roll to desired thickness and cut into baseball shapes. I make giant, five-inch diameter cookies- using a tupperware bowl as my cut-out tool. Bake on ungreased baking sheet for 8 to 10 minutes, or until just beginning to brown around the edges. (longer time for thicker cookies) Gently remove cookies with a spatula and let them cool on wire racks.
MAKE THE ICING:
- In the bowl of an electric mixer fitted with the paddle attachment, combine sugar, meringue powder, and a scant 1/2 cup water on low speed. Beat until mixture is fluffy yet dense, 7 to 8 minutes.
- To thin the icing for flooding (filling in areas with a thin layer of icing), stir in additional water, 1 teaspoon at a time. Test the consistency by lifting a spoonful of icing and letting it drip back into the bowl; a ribbon should remain on the surface for 5 to 7 seconds.
DECORATE:
- Divide the icing into 3 tupperware bowls. Place the lids on each until ready to use or they’ll begin to harden. With icing tub #1, pipe all of the edges on first (around the edge of the round cookie) and let those dry a little bit. Then thin out icing tub #1 slightly and use it to flood the centers. Just spoon it into the middle of the cookie and gently spread to the dried edges. If you give it enough time, it hardens nicely.
- Before the white icing hardens completely, make arcs for the stitching on the baseball. I use the edge of the same tupperware that I use to cut out the cookies to make arc impressions.
- With icing tub #2, I mix in 1 bottle of red food coloring to get a nice dark red color. If you use too little, you’ll end up with magenta stitches. Boys don’t like magenta! Then I pipe red icing into the impressions, and also add the stitches.
- Icing tub #3 can be mixed with whatever food coloring you want (team color, perhaps). Each cookie can be personalized with a name and a number. Let them all dry thoroughly before trying to package them. 24 hours is great, if you have the time.
Notes
- Rather than wait for your cookie dough to chill, take the freshly made dough and place a glob between two sheets of parchment paper. Roll it out to the desired thickness, then place the dough and paper on a cookie sheet and pop it into the refrigerator. Continue rolling out your dough between sheets of paper until you have used it all. By the time you are finished, the first batch will be completely chilled and ready to cut. Re-roll leftover dough and repeat the process. Add added bonus is that you are not adding any additional flour to your cookies.
- You can find meringue powder at a craft store like Michaels- in the baking section (or a baking supply store). It's essential for this recipe.
Nutrition
Nutrition information is automatically calculated, so should only be used as an approximation.




These are too adorable! How DO you find the time????? You are an artist as well as a chef.
WOW oh WOW what delighful cookies!! Your icing skills are fantastic and what a great mom you are!! 🙂
Rosie x
Those look great Lori! So professional looking! I’ll bet the boys on the team think you’re the coolest Mom around 🙂
Val
too cute RecipeGirl
You are such a good mom!!!!!
These are perfect! I have to bring the snack for the last game party on Saturday so now I will be making these!!!!! Thank you, thank you!
Lucky little guys! I love the tip for using the tupperware to make the stitch lines perfect. I should have done that when I was piping my little girl’s tennis ball candies.
Adorable. I love the stitches!
I would’ve asked you where you purchased these cookies too! They look great! 🙂 Your son must be so happy to have you as a mom :D!
Too cute! They turned out perfect!