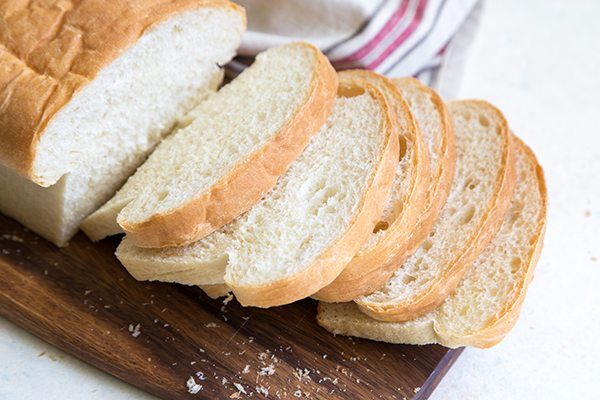
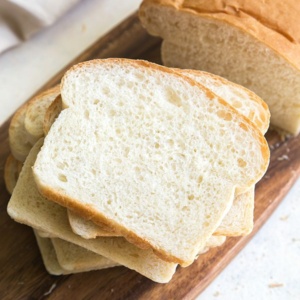
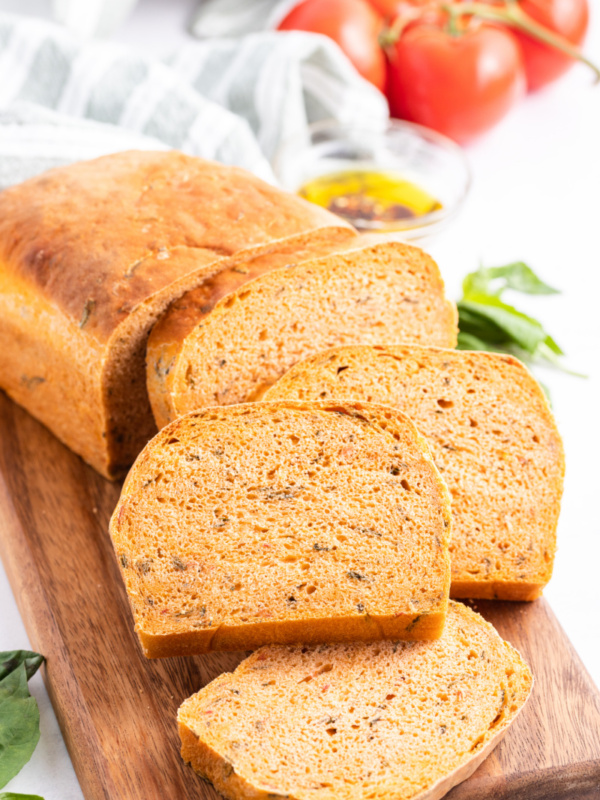
This soft and fluffy classic White Sandwich Bread will bring back memories of childhood lunches.
It wasn’t until my teens that I learned about the wide variety of sandwich bread options available: whole wheat, potato bread, sourdough, brioche, etc. I grew up eating sliced white sandwich bread. The super soft bread that feels like a pillow when you purchase it at the market.
Years later, I still love this bread. While I tend to lean more towards crusty, chewy artisan breads, I will always have a soft spot for white sandwich bread. This homemade white sandwich bread is just like the one from childhood but better! It’s made without any preservatives or complicated ingredients. It’s simply made from a handful of ingredients.
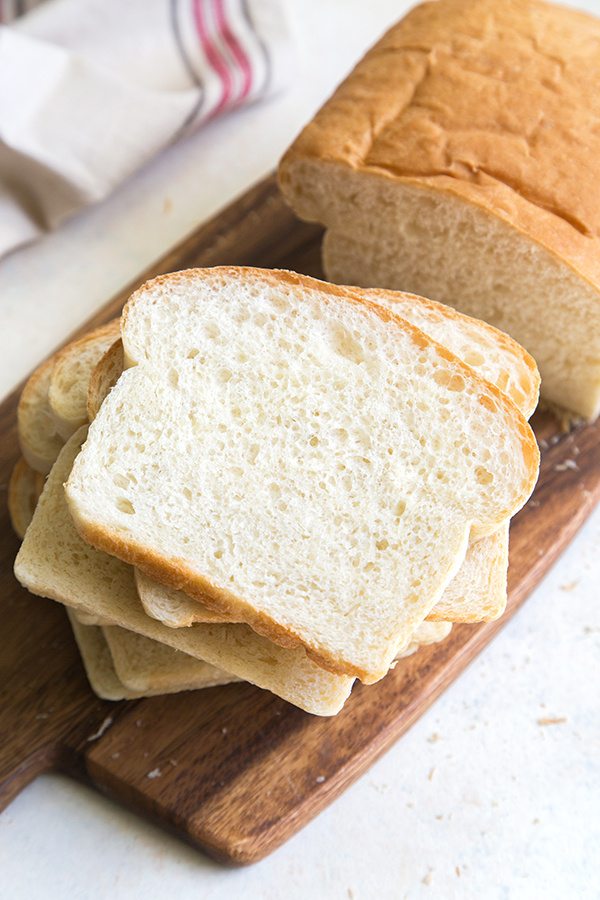
This recipe makes two loaves: one to eat now and one to freeze for later. This is the perfect sliced bread for the quintessential peanut butter and jelly sammie. It’s also fabulous toasted for grilled cheese or a BLT.
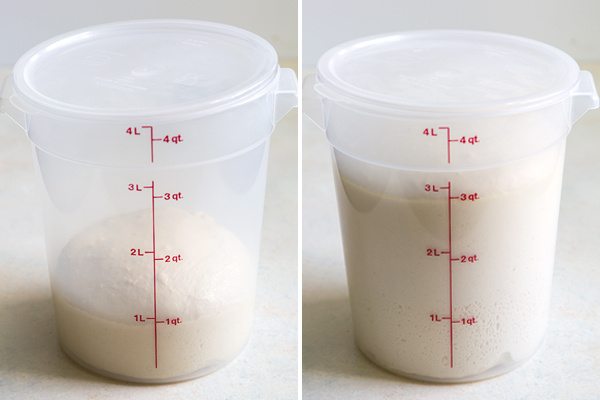
Over the years, I’ve picked up some little tips and tricks for bread making. This one is my favorite- The container photographed above has become my designated dough rising container. When recipes call for the dough to rest and rise, having a container with measurements takes the guess work out. You can clearly see when the dough has doubled in volume. You can also use a dry erase marker (or tape) on a glass bowl to mark desired increments.
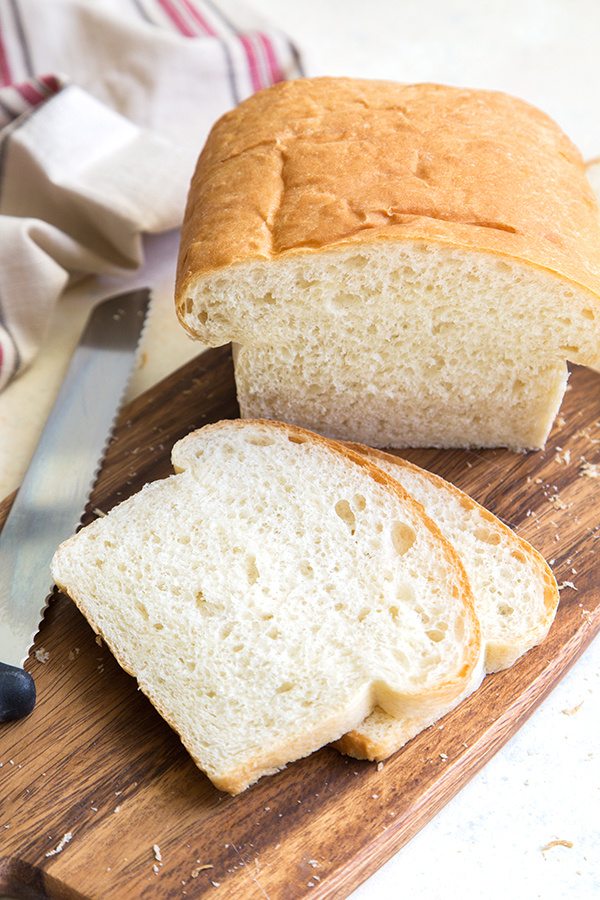
As I’ve mentioned before, the most difficult part of bread baking is waiting for the bread to cool. This particular bread definitely requires patience. The soft bread needs time to build structure as it cools. If you slice the bread while it is still warm, you’ll end up with gummy, dense slices.
White Sandwich Bread
Ingredients
- 4½ teaspoons (two-0.25 ounce packages) active dry yeast
- 1 teaspoon granulated sugar
- 1 cup warm water, about 100º F.
- 1¼ cups whole milk, at room temperature
- 3 tablespoons honey
- ¼ cup (½ stick) unsalted butter, melted and cooled
- 5 cups bread flour
- 1 tablespoon fine sea salt
Instructions
- In the bowl of a stand mixer, dissolve the yeast and sugar in the warm water. Stir to combine and allow to sit for 5 minutes. The mixture will bubble and smell like beer once the yeast has activated.
- Stir in milk, honey, and melted butter.
- Attach dough hook to stand mixer. Add bread flour and salt. Start the mixer on low speed until the dough begins to come together, about 2 minutes.
- Increase speed to medium and knead dough for about 5 minutes until the dough has formed into a ball and no longer sticks to the sides of the bowl. Transfer dough to a large greased bowl. Cover and allow dough to rest for 60-90 minutes until dough has doubled in volume.
- Grease two 9x4 inch loaf pans. Punch down dough and place on a lightly floured work surface. Divide dough into two equal halves. Using the heels of your palms, gently flatten and stretch the dough into a 9x6 inch rectangle (with the longer edge facing you).
- Fold a third of the dough up away from you and roll dough into a tight log. Pinch seams together and place loaf seam side down in greased pan. Repeat with second portion of dough. Loosely cover loaf pans with greased plastic wrap. Allow dough to rise for 60-90 minutes until dough has risen about an inch over the loaf pan edge.
- Preheat oven to 350 degrees F. Remove plastic wrap from loaves. Bake bread for 35 to 40 minutes, rotating midway through baking. The finished bread loaf should be golden brown on top and the internal temperature of bread registers at least 200 degrees F. Allow bread to cool in pan for 5 minutes. Remove bread from pan and allow to cool to room temperature on a wire rack.
- Once bread has cooled, use a serrated knife to slice bread. Store cooled bread in an airtight container for up to 3 days, or longer if stored in the fridge.
Notes
- Calories are per loaf. Individual slices calories will vary with the size of each slice.
- If mixing by hand, use a large bowl and sturdy spatula to combine ingredients. Stir until dough starts to form. Transfer to a lightly floured work surface and knead by hand until dough is smooth.
- To freeze extra loaf: tightly wrap cooled bread loaf in plastic wrap. Place in a freezer safe zip-top plastic bag. It will keep in the freezer for up to one month. Defrost in the fridge before serving.
Nutrition
Nutrition information is automatically calculated, so should only be used as an approximation.
Here are some other bread recipes you might enjoy:
- Japanese Milk Bread by The Little Epicurean
- Honey Whole Wheat Bread by Recipe Girl
- Whole Wheat Irish Soda Bread by The Endless Meal
- Quick and Easy Breadsticks by I Heart Eating


I am a chef by trade. Over 40 yrs. By all accounts my cooking is my passion and I am very proud of my cooking. However I have been told my baking left a lot to be desired. I made and followed the instructions. To say the least WOW!!!!!
Thanks. I will follow you and your recipes.
Once again thanks
It’s delicious! (This is my “go-to” bread recipe. Sometimes I mix it up and add some wheat flour. I make three loaves from this recipe, and make it every 2-3 weeks. Making homemade bread regularly has been a goal of mine. This if the recipe I landed on after trying several others. I haven’t bought sandwich bread in almost a year now.) thanks for sharing!
I halved the recipe to make just the one loaf because 1. it was the first time I was ever making bread without using a bread maker and I thought I might fail at it and 2. I am visiting my parents and I didn’t want to hog up their freezer with a loaf since my mom isn’t a baker or any kind whatsoever.
I AM SHOCKED. This was , by far, the BEST piece of bread I have ever had. I am sure some of that had to do with me making it and being so proud of myself but OH MY…was this sooooo good. Fresh bread is so yummy that I hope I don’t eat this whole loaf tonight. Even the end piece is scrumptious. Thank you and thank you and thank you for posting this recipe and all the other bread recipes.
so happy you love it!