Orange, yellow and white layers give this Candy Corn Cheesecake its festive look. This is such a fun cheesecake recipe for Halloween with real candy corn garnish.
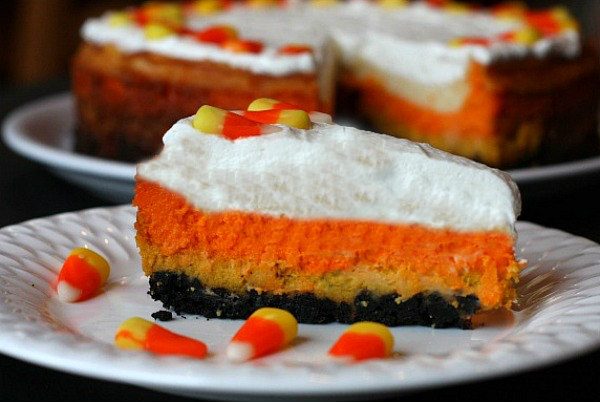
Candy Corn Cheesecake
This recipe was a tear-out of a holiday magazine a few years back. Three layers of delicious, creamy cheesecake make up this festive looking Halloween cheesecake. Those cheesecake layers sit on top of an Oreo crust, and they’re topped with a thin layer of whipped cream.
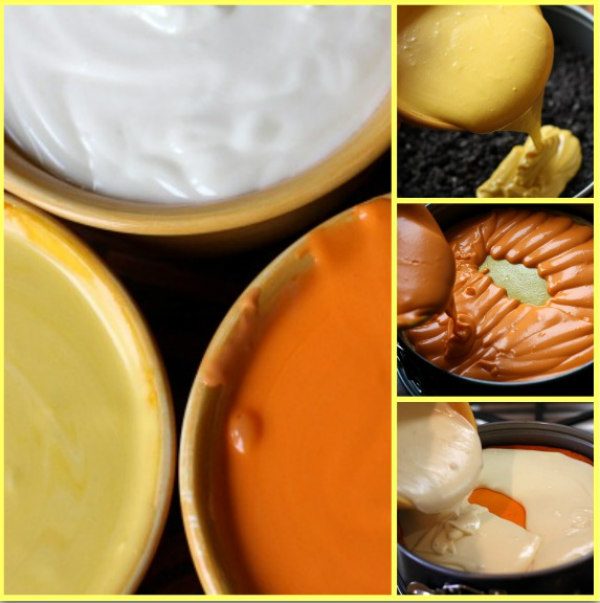
How to Make Candy Corn Cheesecake:
Crushed Oreos are combined with butter to make a simple cookie crust. Cheesecake batter, made special by additions of mascarpone and honey, is divided into three parts and colored with your typical candy corn colors- orange, yellow (and a little left to the side to remain white).
The cheesecake is baked in three stages- yellow layer (then cooled slightly), then orange layer (also cooled), then white. It’s a time consuming process for sure, but it all works out in the end!
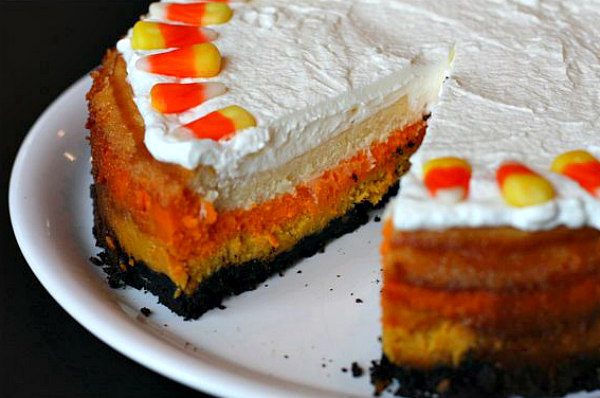
After a long (24 hour) chilling period and careful extraction of the cheesecake from the pan, it’s topped with some whipped cream. This is a nice idea since it easily hides any imperfections on the top of the cheesecake. Topping it decoratively with candy corns makes it more festive too.
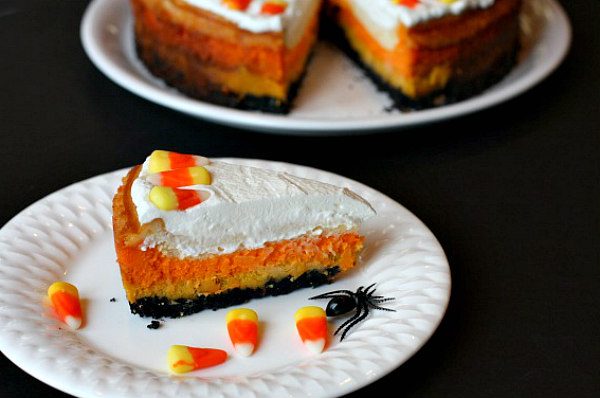
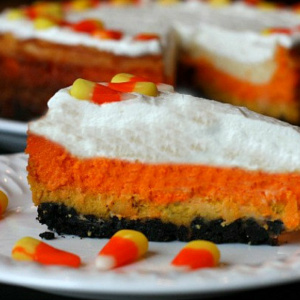
Slices of this cheesecake turn out a pretty display of the candy corn colors. Add some spiders and it’s ready for a Halloween table.
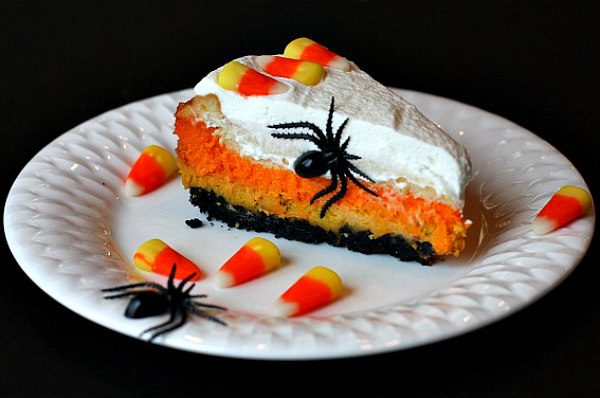
This Candy Corn Cheesecake recipe is fairly easy to follow, but it is indeed a complicated, time-consuming process, and the ingredients called for are quite expensive. I’m wondering if the same process would work with a regular cheesecake recipe to save some cash?
It does turn out a delicious, creamy cheesecake, so in my opinion it’s absolutely worth the expense and the time. If you’re going for an impressive Halloween sweet treat that is hard to resist, then this is your dessert!
If you’re looking for more dessert recipes for a Halloween party, you may also like my Candy Corn Cookies or this Chocolate Spider Trifle. Witch Finger Cookies, Eyeball Truffles and Peanut Butter Zombie Eyeballs are also fun Halloween party desserts!
Candy Corn Cheesecake
Ingredients
CRUST:
- 24 Oreos, finely crushed
- ¼ cup (½ stick) butter, melted
CHEESECAKE:
- 3 8-ounce packages cream cheese, at room temperature
- 8 ounces mascarpone cheese, at room temperature
- 8 ounces sour cream
- 1½ cups honey
- 1½ cups granulated white sugar
- 6 large eggs
- ⅓ cup all purpose flour
- ½ cup heavy whipping cream
- 1 teaspoon vanilla extract
- yellow & orange color paste (or gel)
TOPPING:
- ½ cup heavy whipping cream
- 1 cup candy corns
Instructions
- Preheat the oven to 350°F. Spray 10-inch springform pan with nonstick cooking spray (see recipe notes below if you only have a 9-inch pan).
PREPARE THE CRUST:
- In a medium bowl, combine the cookie crumbs and butter. Press into the bottom of the prepared pan. Bake for 10 minutes; remove from oven and let cool.
PREPARE THE CHEESECAKE:
- In a large bowl, combine the cream cheese, mascarpone, and sour cream. Beat at medium speed with an electric mixer until smooth, about 3 minutes. Add the honey and sugar; beat until combined. Add the eggs, one at a time, beating well after each addition. Using a rubber spatula, scrape down the sides of the bowl, and beat until smooth. Reduce the speed to low. Add the flour, cream, and vanilla, beating until combined. Divide the batter into thirds, reserving one-third of the batter white. In one bowl, add a small amount of yellow color paste; whisk until combined and add more color until the desired hue is reached. In a second bowl, repeat this process with the orange color paste.
- Pour the yellow batter over the baked cookie crust. Bake 30 to 35 minutes, just until set and no longer jiggly. Remove from the oven and let cool for 20 minutes.
- Pour the orange batter on top of the baked yellow layer. Bake for another 30 to 35 minutes, just until set and no longer jiggly. Remove from the oven and let cool for 20 minutes.
- Pour the remaining white batter onto the baked orange layer. Bake for another 30 to 35 minutes, just until set and no longer jiggly. Remove from the oven and let cool completely.
- Refrigerate for 24 hours. Gently run a sharp knife around the edge of the pan; then release the sides. Slide a long, sharp knife under the bottom of the crust and carefully slide the whole cheesecake onto a platter, removing the bottom of the pan (if you feel brave enough!)
PREPARE THE TOPPING:
- In a medium bowl, whip ½ cup of heavy whipping cream at high speed until stiff peaks form; spread the whipped cream on top of the cheesecake; use candy corn to decorate. Refrigerate until ready to serve.
Notes
- Color paste or gel can be found at craft stores like Michael's. You can use liquid coloring in place of the paste/gel. Mix red & yellow to create orange.
- Using a 10-inch springform pan will ensure that you use up all of the batter in this recipe. I only had a 9-inch pan and left about 1/2 cup or so of batter out of each layer (with the extra batter, I made a mini cheesecake on the side).
Nutrition
Nutrition information is automatically calculated, so should only be used as an approximation.



This was fun to make. Posted some photos on Facebook. I do think it needs to be placed in the header of this recipe that there is a 24-hour cooling time. We read the recipe a couple of times, but didn’t notice that instruction until the morning of our preparation for the dinner. May need to put it in the freezer for a few hours, I guess.
Thank you- I did add that in the intro to the recipe.
I don’t have a sprinform pan. Is there anything else I can use?
No, for cheesecake you need to use a springform pan.
I am in the process of making this cheesecake right now! (It’s in the 24 hour cooling process in my fridge.) I can’t wait to try it tonight!
@Megan, ooooo, let me know how it goes!
Definitely a showstopper!! Love this – so creative and luscious!